Start by carefully releasing the lens fixing screws. If the screws are tight, spray them first with penetrating oil.
Lift the lens away. On most cars there is a seal behind the lens. If your car has one, be careful not to tear it while you do this.
Find how the cluster casing is fixed to the car body. Slacken and remove the fixings. Make sure you do not lose any washers or seals fitted behind them.
If the wiring is still connected at this stage, pull the unit out far enough so you can pull the wires off their connectors, then remove the unit completely.
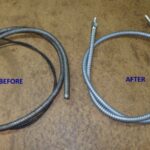
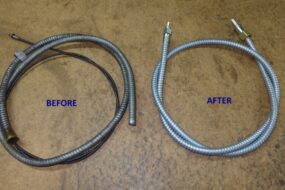
Old and new types of cluster unit
The older type of cluster unit (right) often has its lens secured by
external screws and can be removed separately.
These units are often wired so each individual bulbholder has its own connector, and you may be able to remove the bulbholders from the unit
without disconnecting the wiring.
The later type of cluster units (left) are a little more complicated to remove. The lens cover can often be removed only from the back of the unit
which may require that the entire cluster be removed from the car.
In some cases the lens is integral with the cluster casing, and if it
breaks you will have to fit an entire new unit.
Removing a new-style cluster
Gain access to the cluster by removing any trim panels that are in the way.
Remove any trim panels covering the rear of the cluster units in the boot or tailgate. Disconnect the battery and then the multi-plug from
the light unit.
Find and remove the fixing screws, bolts or nuts from the cluster unit (3), noting if they are different lengths. Then carefully pull the unit out
of its aperture in the car body.
Pull the mult-connector plug out of the light unit.
Undo the screws holding the cluster unit to the car body.
Simpler types
The most simple type of cluster has the lens cover held to the cluster casing by small screws which pass through the lens. To remove the lens you simply unscrew the fastenings. However it is worth taking a few precautions
first.
The securing screws are invariably of the cross-headed type but they may be either Pozidriv or Phillips. So make sure that you use the correct type and size of screwdriver to remove them. They may have become corroded due to their exposed location and if you use an incorrect screwdriver it is easy to strip or
even break off the screw.
If you find the screws are really tight, soak them with penetrating oil, allowing time for it to work in before trying the screws again. Once the screws
have been removed the lens can be lifted away.
Bulbholderpanel
A panel-type bulbholder
Now look for securing screws around the cluster casing. If you see them, you can remove the cluster simply by undoing them. But first disconnect the battery terminals and the wiring to the bulbholders. Then release the securing screws
and the unit should now lift out with the bulbs and their holders in place.
If you cannot see any fixings, or if you cannot at this stage disconnect the wiring, then you will have to dismantle the unit further before you can remove it. The procedure for doing this is the same as for the more complex type of
light cluster.
Cleaning lenses
If you have removed your lens because it was dirty, or if you need to clean up a second-hand replacement item, you can do this with soapy water
and an old soft toothbrush.
Gently scrub out all dirt and grime from the lens. The silver backing around the bulbs can also be carefully cleaned in the same way. But take care not to scrub this too hard or you may find the silvering will start to
lift off.
Before reassembly make sure the inside of the lens and bulbholders is
absolutely dry.
Complex types
The more complex type of cluster unit has its lens cover attached to the casing from the rear. There are no exposed screw heads on this type and the entire cluster unit will need to be removed from the car before the lens can be
removed or the cluster checked.
Open the tailgate or boot lid so you can see where the rear of the cluster sticks out. The cluster will often be covered by a trim panel. Remove this first to gain access to the rear of the unit. The covers are often held by one or more simple wing nuts or turn buttons and can usually be removed by hand. The section in your car handbook on changing the bulbs should tell you how to
remove them.
Wiring connections
Start by disconnecting the battery earth terminal as a safety precaution.
Look at how the wiring is attached to the cluster unit.
Older style units have individual Wires running to each bulbholder. You may be able to pull out the bulbholders without having to disconnect the wiring. If this is not possible label the wires as you disconnect them so they don’t
become muddled on reassembly.
Later units use multi-plug connectors. These may be a tight push-fit and simply pull off. Others engage positively on to the cluster casing and you have to press in the small thumb tabs on each end of the connector to release
them.
If the rear of the unit is not accessible, the wiring can only be disconnected once you have unbolted and partially removed the unit from the
car.
Fixings
Find where the main cluster fixings are located. Vertical units usually have a fixing at the top and bottom while horizontal ones have them at each end and may also have one located at the top and bottom. The fixing may be a bolt or screw which threads into the cluster unit or it may be small nuts which tighten
on to studs fixed into the cluster casing.
Remove the fixings and carefully withdraw the cluster from the car. You may have to twist it to get it to come out of its aperture. Take care not to damage the seal between the cluster unit and the body as you withdraw the unit.
Disconnect the wiring at this stage if you couldn’t do so before.
With the cluster now removed look at the back of the unit to find the fixings that secure the lens. Undo them, noting if they are of differing lengths, and if so note where they fit. The lens can now be separated from the
cluster unit.
Drilling a drain hole
If the problem with your light unit was that it was filling up with water you may be able to prevent the problem occurring again by making
extra drain holes in the lens.
With the casing removed, very carefully drill extra holes into the lower edge of the lens with a Vl2in (2mm) drill bit. Make a mark in the drilling
position before you start to prevent the drill from slipping.
It is a good idea to check the holes are clear using a pin every six
months.
Maintenance work
Reshape connector strips with a small screwdriver.
When the cluster has been removed you can carry out certain checks to
make sure everything inside is in good condition.
Start by checking the wiring connections for corrosion. The multi-plug connectors often have small sprung metal strips inside them which make the connection. If these have become distorted or weak carefully bend them back
into shape with a small screwdriver.
The more conventional terminals and earth points should be cleaned with wet-or-dry paper and coated with vaseline to prevent further
corrosion.
Some light clusters use printed circuits to join the multi-plug connector to the individual bulbholders. These can be checked for feed using a test lamp. If any break is found in the printed circuit it will
usually have to be replaced.
Other cluster units use metal strip connectors between the multi-plug and bulbholders. These should be checked for corrosion in the same way as
normal spade connectors.
Use wet-or-dry paper to clean away corrosion from the terminals.
Check a printed circuit for continuity with a test lamp.
Sealing gaskets
Take care when lifting the lens cover away from the cluster unit. It may not have been moved for some time (possibly never before) and may be tight on its
mounting.
Gently tap it with your hand to break any bond that may have formed between the lens and sealing gasket. Then lift the lens up gently, making sure that you
do not tear the gasket behind as you do so.
If you find the gasket has become torn or perished you will have to buy a replacement for reassembly. New gaskets should be available from your dealer but if you can’t find one you can use a sealing mastic carefully applied in its
place (see sideline overleaf).
Reassembly
The light units are reassembled in basically reverse order to dismantling. Remember not to overtighten the lens or cluster securing fixings as they
usually screw into plastic, which easily cracks.
The multi-plug connectors often have a slot formed in one end so they can only be fitted one way round. Reconnect the battery only after all wiring connections have been made. Finally turn on the ignition and check that all the
lights are working. Ask a friend to operate the switches while you check.